
Sitting in a Freezer, Literally! My Experience with Cold Therapy and a DIY Cold Plunge Guide Under $75
"But why would you voluntarily sit in a freezer full of cold water?" you may ask. Well, I asked myself the same question the first few times I tried it. However, after years of practice, I can reassure you that you will become accustomed to it, and it won't be as torturous as it initially seemed. And the benefits? I absolutely love them! So let's dive into what makes this all worth it.
Hello, my frosty friends!
Today, I wanted to delve into one of my other health routine's - cold therapy. I've been practicing this for quite some time, occasionally posting snippets about it. However, I realized I've never shared an in-depth story about why I do it. So, that’s what this blog post is all about.
What is cold therapy?
What exactly is cold therapy, you might be asking? Great question! Picture this: it's a crisp winter morning, and you choose to step out and plunge into the cold ocean, lowering your body temperature. That, my friends, is the essence of cold therapy. To lower your body’s temperature!
Admittedly, cold therapy is still a field that lacks definitive, conclusive studies. However, more research is coming out, most of which highlights potential benefits. But the exact protocols are still unclear. All I can share is my experience and what works for me, which is exactly what we will be doing here.
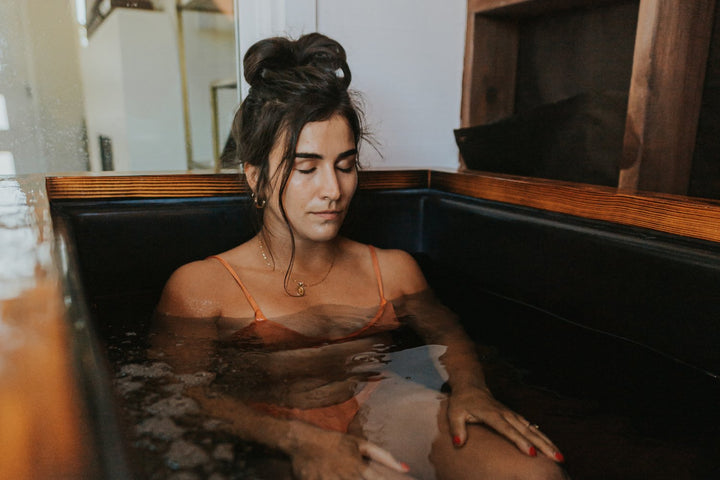
There are a few different types of cold therapy methods, but the two I personally prefer are the cold plunge (submerging yourself into cold water) and the cryochamber (entering a cold room or tube). With its white smoke-ish floating around and high tech gear, stepping into a cryochamber feels a bit like walking into a superhero's gadget lab. While it's an easier entry, it's not something you can casually set up at home unless you're willing to shell out more than $30K. On the other hand, a cold plunge is like having a personal polar paradise in your backyard, and it's undoubtedly the more accessible and budget-friendly option. I don't notice a difference in the benefits between the two, but due to convenience, I use the cold plunge for most of my cold therapy.

Benefits of Cold Therapy
"But why would you voluntarily sit in a freezer full of cold water?" you may ask. Well, I asked myself the same question the first few times I tried it. However, after years of practice, I can reassure you that you will become accustomed to it, and it won't be as torturous as it initially seemed. And the benefits? I absolutely love them! So let's dive into what makes this all worth it. There are two perspectives - the scientific one and my personal experiences.
Let’s start with the fancy one. Research suggests cold therapy may help reduce inflammation, improve mood and sleep, boost recovery, increase metabolism, release dopamine, increase energy, and increase brown fat (the good kind of fat), among other benefits. As you can see, the list is quite extensive!
But perhaps more importantly, let me tell you about my personal experience. Of course, this is not a guarantee that you will feel the same way, but I believe it's vital to share my personal experiences rather than merely listing potential benefits.
For me, immediately upon getting out of the cold plunge, I feel…. cold. Just kidding, but obviously, I am cold when I get out, which is the whole point. Then, over the next couple of hours, my body feels like it’s trying to heat itself. It may sound odd, I know, but it’s true. It’s not that I’m cold for hours after, but I can definitely tell that my body is in a different state, and that feeling is fantastic! It's somewhat similar to the healthy, satisfying feeling you get after a good workout.
Furthermore, I feel much more energized! On workout days, I feel pumped and ready to tackle the gym! Like a kid on their way to first basketball practice of the season. On non-workout days, like today when I’m writing this blog post, I feel more focused and less in need of small breaks. I don't experience the same fatigue and work more efficiently.
Lastly, I sleep better. I find myself calming down more easily and falling asleep faster. Interestingly, when I track my sleep using wearable devices, I usually see a higher quality of sleep on days when I plunge into cold water.
To me, these are the main three benefits I reap from cold therapy: a healthy, satisfactory feeling, increased energy and focus, and improved sleep quality. What about the increased metabolism, enhanced recovery, reduced inflammation and all the other benefits listed earlier? I definitely notice my body has less aches and pains when training 4+ hours a day so my recovery is better. As for the increased metabolism and other benefits, well, I don’t doubt their validity, but I simply can't measure them personally.
My Cold Therapy Protocol
Over the past couple of years, I've experimented with different protocols. For a while, I practiced hot/cold contrast therapy, this involved alternating between 7 minute sauna sessions and 3 minute cold plunges, for a total of three sets. However, I've recently found that focusing on cold therapy in the mornings and hot therapy in the evenings works best for me. (I'll share more on hot therapy in a later blog post).
I now aim to start my day with cold therapy, before breakfast. There's nothing quite like a cold plunge to wake you up and get you ready to conquer the day! If I have a strength training session planned, I aim to finish my cold plunge at least 3 hours before the session and 1 hour before aerobic conditioning. If for any reason I opt for a cold plunge later in the day, I follow the same 3-hour and 1-hour rules to ensure I don't get into the plunge within that timeframe after the session.
I don’t go in every day. Instead I aim to accumulate a minimum of 11 minutes per week, spreading it out as I find convenient. However, my goal is to achieve between 15-20 minutes per week, typically broken up into 3-5 minute sessions. I find this to be a good balance between cooling my body's temperature without beginning to shiver and feeling cold for the rest of the day. The colder the stimulus (water immersion, shower, etc.) the shorter amount of time you need to expose yourself to the cold.
And the question I get asked the most… "What temperature do you recommend?" It's a good question, and I wish I could give you a one-size-fits-all answer! Most of the books, podcasts, and studies I've encountered recommend a range between 40-50 degrees Fahrenheit (4.5 - 10 degrees Celsius). Personally, I find the sweet spot to be around 42-46 degrees Fahrenheit (5.5 - 8 degrees Celsius). Any colder, and I struggle to get in, shivering almost immediately. Just to be clear, shivering is okay as long as it is not excessive. Above 50 Fahrenheit (10 Celsius), I don’t get the same feeling as I do at the lower temperatures. But ultimately, I recommend experimenting to find what temperature works best for you.
What Kind of Cold Plunge Should You Use?
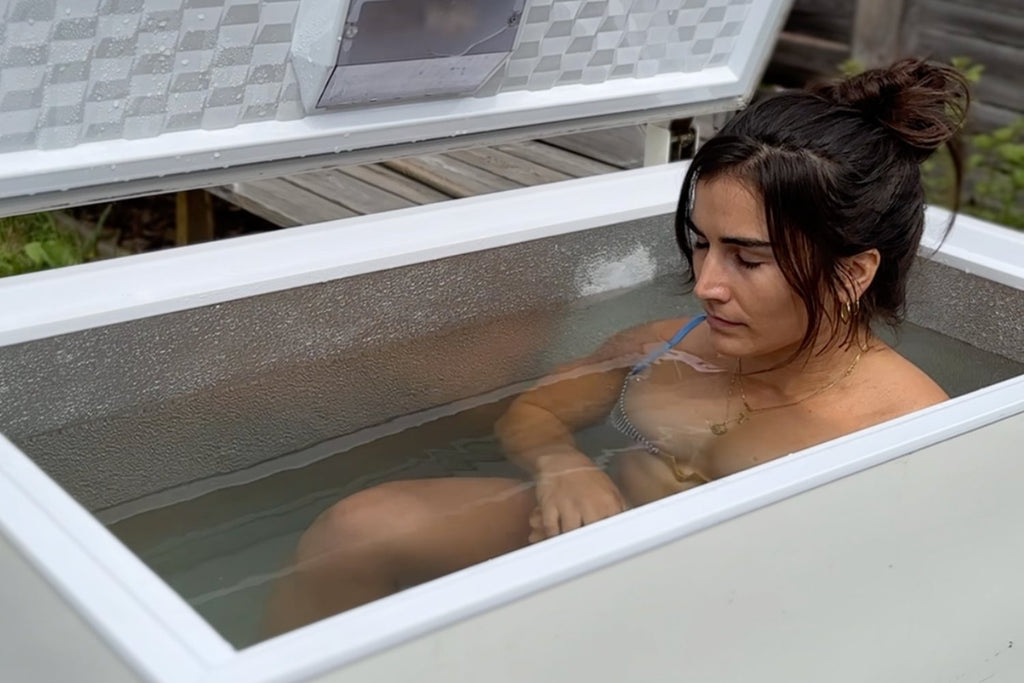
When I'm home, I'm fortunate to have access to an actual cold plunge complete with a filter and temperature regulator, courtesy of my amazing parents who live close by. However, as I'm currently in Denmark for a while, that luxury is not available. Therefore, I've built my own DIY cold plunge! And honestly, that’s what sparked my thoughts of this blog post. So, whether you're away from home or just want to dive into cold therapy without breaking your bank account, here's a step-by-step guide to building your own icy oasis.
Step-by-Step Guide to
Building Your Own Cold Plunge
Step 1: Find an old chest freezer. If you plan to use it long term, consider purchasing a new, energy-efficient model. Keep in mind the size you need. A larger chest freezer can accommodate two people, and the water temperature won't increase as much when you're inside (yes, your warm body does raise the water temperature). However, a smaller model is easier to fill, clean, and it requires less energy to maintain a consistent temperature.

Step 2: Position it on a level surface. I prefer mine outdoors, but this will depend on your location and the season. Just know, once you’ve added water, that thing ain’t going anywhere.

Step 3: Clean the freezer thoroughly, especially if it's a used model.

Step 4: Caulk all seams and openings inside the freezer. Don't block the drain, though. You'll need it for water changes. This is where my husband came in handy - Well actually he was also the one picking it up and placing it on a level surface as well, you get the point 😂 But hey, teamwork makes the dream work, right?
When caulking, it's best to use a caulk designed for continuous water exposure, such as those meant for pools and tubs. If you can't find that, caulk designed for bathrooms, showers, and sinks will do. It's been effective for us so far. Our first freezer's caulking lasted over a year and looked brand new when we got rid of the freezer.

Step 5: Fill it up, but remember, don't go all the way to the top. The water level will rise when you get in. Yes… I’ve made that mistake multiple times!

Step 6: Optional, but recommended. Add 5-7 large bags of ice cubes. This will significantly reduce the time it otherwise takes for the freezer to lower the temperature.

Step 7: Plug in the freezer and wait for the temperature to drop to your desired level.

IMPORTANT: I can't stress this enough: ALWAYS, and I mean ALWAYS, unplug the freezer before you take the plunge. Safety first! This seems like a good place for a disclaimer:
"The information provided in this blog post is based on personal experience and is not intended as professional advice. Always consult with a healthcare professional before starting any new health or wellness regimen, such as cold therapy. If you decide to construct and use a DIY cold plunge, seek professional advice to ensure safe assembly and use. By acting on any information in this blog, you assume all responsibility for any resulting consequences. The author of this blog will not be held liable for any injury, health issue, or adverse event related to the use of the information shared."
But in all seriousness, unplug the freezer every time before you go in to prevent yourself from getting shocked. I even recommend a safety mechanism such as a lock on the freezer with the key attached to the plug. This ensures that order for you to unlock the freezer you would need to unplug it. It serves as a good reminder so you never forget.
Step 8: Now that your freezer have reached the desired temperature level and you have unplugged it, you can dive in and enjoy your cold therapy.

How Much My New
Cold Plunge Really Cost
Curious about the exact amount I spent to bring my DIY cold plunge to life? Let's crunch the numbers! First, Ras haggled the price of an old chest freezer down to a bargain at $29.40. Next up, he spent $11.70 on caulk and $17.60 on six bags of ice. Totaling just $58.70 and a few hours of our time. I would say that's quite the savvy investment right there!
Ways to Improve Your DIY Cold Plunge
Okay, so now you have a sexy new cold plunge and that is pretty cool. It really is! However, I hope you showed it to your family and friends before you started using it, because frankly it does become quite dirty relatively quickly. BUT good news, there’s ways to fix this.
One option it to get rid of your fancy new cold plunge freezer and instead buy a dedicated cold plunge with filters, temperature regulator and other cool gadgets like my parents. Just kidding, those are indeed fantastic but of course not cheap.
The more budget-friendly options involve following some of these tips below, listed in order of importance. Remember, none of these are required, but they will help keep your water cleaner and prolong the time between necessary water changes. Additionally, some of them come with additional health benefits.
- First one on the list actually has nothing to do with keeping your cold plunge clean, but none the less I placed it on top of the list as it’s maybe the most important. A temperature plug! This is a device you plug into the wall between the freezer cord and wall plug. It has a cord that you place into the freezer that measure the temperature. You can then set your desired temperature and it will turn on/off depending on these temperatures. Pretty smart right! So for me I just place the variance between 42-46 degrees Fahrenheit (5.5 - 8 degrees Celsius) and every time I open the lid the temperature is somewhere within that range.
- Shower yourself before getting in. I know I know. This also has nothing to do with ways to improve your cold plunge. But I promise you that you’ll thank me later. This little trick prolongs the life of the water.
- Now onto actual things that can improve your cold plunge experience. Install a small fish tank pump to keep the water circulating. This helps prevent bacterial buildup in the stagnant water. Remember, though, to unplug it before getting in.
- Add salt! Not just any salt. I suggest Epsom salt, magnesium bath flakes, and/or Dead Sea salt. These will help keep the water clean and provide benefits to your skin and well-being.
- Add a water filter. This is a more costly option, but it effectively sucks in water, filters it, and returns it to the freezer, keeping it nice and clean.
- Grounding! Insert a copper wire a couple feet into the ground or an electrical grounding outlet and into the water. This grounds the water, offering more health benefits and supposedly also helping to clean the water.
- The most costly item on this list is an ozone generator. It adds ozone to the water to sanitize it. While this is beyond my pay grade, I've heard multiple people recommend it, and I did notice a difference in cleanliness when I used it with our first freezer.
That’s it! Remember this is my personal journey and experience. This is not to say that you will feel the same, but I would highly encourage you to test it out. Maybe you start small with a tub, water and some ice cubes to see if cold therapy is even something you like. Keep in mind, it gets easier over time! Like everything else, it takes time! I am not an expert and if you decide to dive into this you should do some more research on your own.
I recently came about a great podcast between Andrew Huberman and Susanna Søberg. They talk cold therapy for over 2.5 hours and really dive deep into the subject. I've added the video below for your connivence should you wish to dive deeper.
So, there you have it, folks! That's my guide to cold therapy. This is just my experience. I say this, because I always have people reading these things and then afterwards lecturing me about how I am not a doctor or expert. Funny enough though, they still say it even when I include this, but none the less, here you have it again 😉
Stay cool!
LF
JM on
Did you look into the risks of cold therapy? Seems like it might not be great if you have a heart condition: https://www.longevityadvice.com/cryotherapy-benefits/
Christin on
Do you mind sharing how big your freezer is? So we know what to look for on marketplace or craigslist :)